
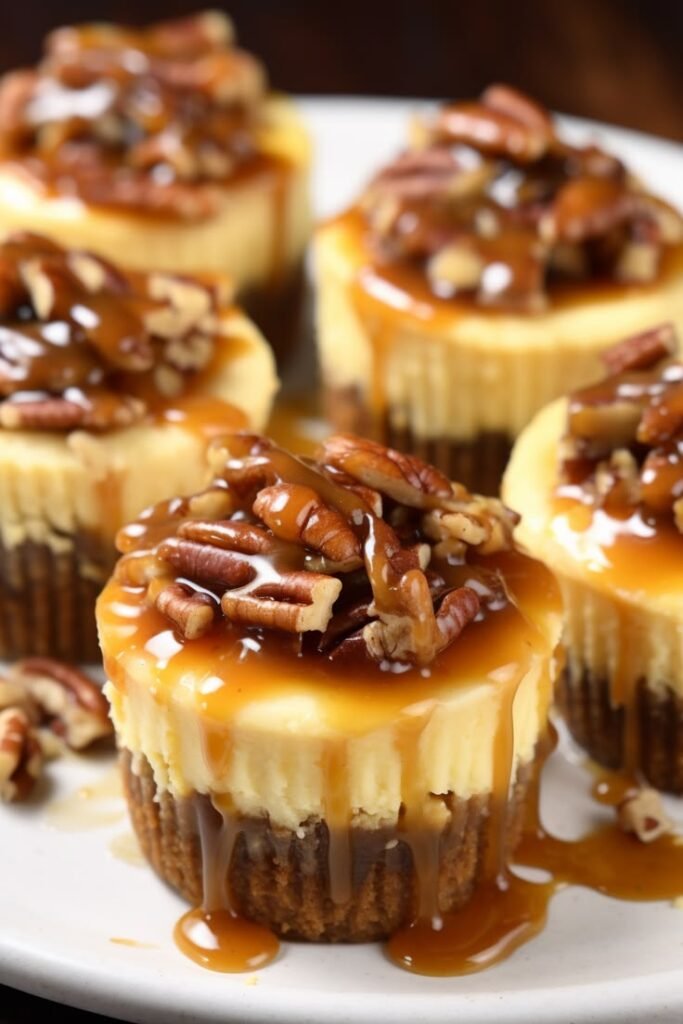
Mini pecan pie cheesecakes bring together two familiar desserts in one carefully balanced bite. They pair the cool, smooth, tangy character of cheesecake with the deep, toasted flavor of pecan pie. Rather than competing, the layers give each other definition: a lightly crisp or tender buttery crust supports a creamy filling, while a glossy caramelized pecan topping adds warmth, crunch, and gentle molasses-like richness.
The miniature format makes this combination especially appealing. Each cheesecake is an individual serving, which simplifies portion control without making the dessert feel restrictive. Their neat, layered appearance also creates an attractive presentation for holiday tables, dinner parties, and potlucks. Because small cheesecakes require less batter than a full-sized cake, they generally bake more quickly and are easier to chill, arrange, and serve. They can also be prepared ahead, allowing the host to finish the meal without a last-minute dessert task.
Several simple components create the finished contrast. A crumb crust, often made with graham crackers or another buttery cookie, contributes a firm foundation and mild toasted flavor. The cheesecake layer brings tanginess and moisture, keeping the dessert from tasting one-dimensionally sweet. On top, pecans coated in a brown-sugar or caramel-style mixture provide a glossy finish and a pleasing blend of softness and crunch. The topping should be rich but thoughtfully proportioned, so its sweetness complements rather than overwhelms the filling. Chilling the assembled portions helps the layers set cleanly and allows their flavors to develop. The result is a polished dessert that feels both familiar and special: creamy, nutty, buttery, and suitably indulgent in a compact form.
Begin by preparing the crust before mixing the cheesecake batter. Finely crushed graham crackers provide a classic flavor, while vanilla wafer cookies create a sweeter, more delicate base. Combine the crumbs with melted butter and a small amount of granulated sugar, using enough butter to moisten the mixture without making it greasy. A small pinch of salt can sharpen the flavor, and optional warm spices, such as cinnamon or nutmeg, complement the pecan topping. The crumbs should resemble damp sand and hold together when pressed.
Line a muffin tin with paper liners, or use a mini cheesecake mold, and divide the crumb mixture evenly among the cavities. Press it firmly with the back of a small spoon, a flat-bottomed glass, or a measuring tool, concentrating on creating an even surface. The pressure should be sufficient to bind the crust after chilling, but avoid compacting it into a thick, dense layer that becomes difficult to cut or eat. Set the prepared crusts aside while the filling is made, or chill them briefly to help them firm.
For a smooth cheesecake layer, use softened, full-fat cream cheese, granulated sugar, eggs, and vanilla extract. Sour cream or a small amount of heavy cream may be added for extra tenderness and a gently tangy finish. Room-temperature ingredients blend more evenly and reduce the need for prolonged mixing. Beat the cream cheese and sugar just until smooth, scraping the sides and bottom of the bowl regularly. Add the eggs one at a time, mixing gently after each addition, then incorporate the vanilla and any optional dairy ingredient.
Avoid whipping excess air into the batter, since trapped bubbles can cause uneven baking or cracks as the cheesecakes cool. Portion the filling over the chilled crusts using a spoon or small scoop, filling each cavity to a similar level. Smooth the surfaces lightly without pressing aggressively. Even portions help the mini cheesecakes bake at the same rate and produce neat, consistent layers, with the buttery base supporting the creamy center without overpowering it.
Prepare the pecan topping while the cheesecake bases are ready for filling. Use finely chopped pecans for an even, spoonable layer, or choose very thinly sliced pecans for a more textured finish. Combine them with brown sugar, melted butter, maple syrup or light corn syrup, vanilla extract, and a small pinch of salt. Brown sugar supplies molasses-like depth, while the butter creates a rich, glossy coating. Maple syrup adds a gentle toasted sweetness, and corn syrup produces a smooth, shiny mixture that helps prevent the sugar from crystallizing. Vanilla rounds out the flavor, and salt balances the sweetness while emphasizing the natural nuttiness of the pecans.
Stir the mixture until the pecans are evenly coated, then divide it carefully among the cheesecake portions. Distribute the topping rather than placing it in a single mound, ensuring that each mini cheesecake receives a balanced amount of nuts, syrup, and caramel flavor. Consistent portions promote even baking and give every serving the same pleasing combination of creamy filling and buttery pecan topping.
Preheat the oven fully before baking, since an accurate starting temperature helps the crust, filling, and topping set at the same rate. Use a muffin tin or mini cheesecake pan, and fill each cavity to a similar level. Bake at the recipe’s specified moderate temperature, checking the cheesecakes near the expected finishing time. The edges should look set and slightly puffed, while the centers should retain a gentle jiggle when the pan is moved. This movement indicates that the filling will finish setting as it cools.
Avoid relying only on color to judge doneness. Overbaking can dry the cheesecake and make the pecan mixture excessively firm or hard, whereas underbaking may leave the filling loose and difficult to remove cleanly. When baked, place the pan on a rack and let the cheesecakes cool gradually at room temperature. Once they are no longer warm, refrigerate them thoroughly, preferably for several hours. Chilling firms the centers and topping, making the mini cheesecakes easier to release from the pan without damaging their delicate crusts.
Let the mini cheesecakes cool completely in the pan before serving. Chilling them for at least two hours gives the filling time to firm and makes each bite clean and creamy. For the best texture, remove them from the refrigerator shortly before serving, allowing about 10 minutes at room temperature. Finish each cheesecake with a small swirl of whipped cream, a drizzle of caramel sauce, a sprinkle of flaky salt, or a few toasted pecans. Arrange the desserts on a platter with space between them so the toppings remain neat, and add a few whole pecans or caramel lines around the display for an inviting presentation.
Store leftovers in an airtight container in the refrigerator for up to five days. Place parchment between layers if necessary, but avoid stacking cheesecakes with soft decorations. For longer storage, freeze the un garnished cakes on a lined tray until firm, then transfer them to a freezer-safe container or tightly sealed bag. They will keep well for approximately two months. Thaw frozen cheesecakes in the refrigerator overnight rather than using high heat, which can make the filling watery and the crust tough. Add whipped cream and other delicate garnishes after thawing.
A crumbly crust usually needs a little more melted butter or firmer packing before baking. Cracked tops often result from overbaking or sudden temperature changes, while a sunken center may indicate underbaking or excessive mixing. If the filling is runny after chilling, refrigerate it longer; if it remains loose, check that the cream cheese was measured accurately and that the cakes reached a fully set center. Sticky pecan topping can be chilled briefly before serving. To remove difficult cakes, loosen the edges with a thin knife and peel the liners away slowly once the desserts are cold.
For variations, add cinnamon or a small splash of bourbon to the pecan layer, replace the base with chocolate cookie crumbs, or use salted caramel as a topping. Walnuts, hazelnuts, or almonds can replace the pecans. Standard muffin tins produce slightly larger portions and may require extra baking time, while larger muffin cups create generous individual desserts; adjust the filling level and begin checking for doneness a few minutes early.