
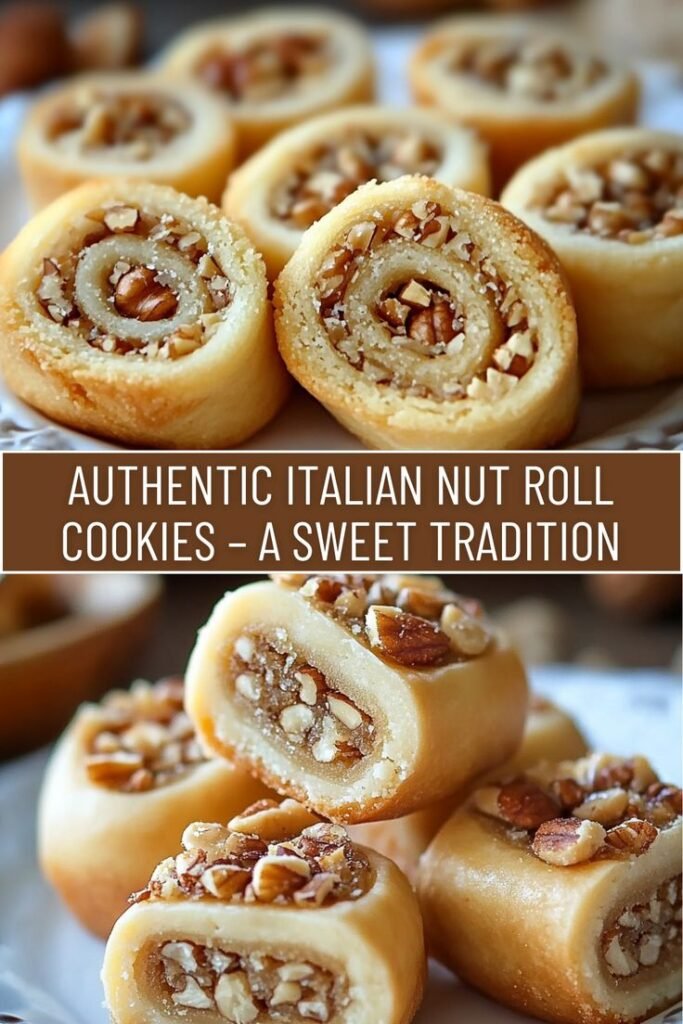
Italian nut roll cookies carry the kind of appeal that comes from being made, shared, and remembered across generations. In many family kitchens, they appear during holidays and special gatherings, when baking is as much about bringing people together as it is about preparing something sweet. A tray of these pastries can feel familiar even to someone encountering them for the first time: their simple shape, inviting aroma, and generous filling suggest a recipe with a history rooted in home cooking. The exact story differs from one household to another, but the pleasure of passing a batch around is widely understood.
The defining feature is the contrast between a tender, buttery dough and a rich center of finely chopped nuts. Sugar adds sweetness, while complementary flavorings may bring warmth, fragrance, or a hint of brightness. Depending on the recipe, the filling might include ingredients such as cinnamon, citrus zest, vanilla, or a small amount of honey. Once rolled together and baked, the dough becomes lightly golden and delicate, while the nuts remain flavorful and substantial. Cut into slices, the finished pastry reveals a pleasing spiral that makes each cookie both attractive and easy to serve.
There is no single formula that represents every Italian nut roll. Family recipes vary in dough ingredients, filling proportions, shaping techniques, and preferred flavorings; regional traditions and the ingredients available to each cook have helped create those differences. This recipe is best understood as a traditional-style version, not a claim to be the only authentic method. Readers can expect a homemade pastry with golden layers, a fragrant nut filling, and neat slices suited to a holiday platter, a coffee break, or a thoughtful edible gift. Its character rests less on strict uniformity than on the balance of buttery pastry and warmly sweet nuts, prepared with care and shared generously.
The pastry for Italian nut roll cookies begins with all-purpose flour, which provides structure while keeping the dough easy to roll. Measure it accurately, preferably by weight or by lightly spooning it into a measuring cup and leveling the top; too much flour can make the pastry dry and difficult to handle. Cold butter is essential for a rich, flaky texture. Cut it into small pieces and work it into the flour until the mixture resembles coarse crumbs, leaving some small butter pieces rather than blending everything completely. A little sugar adds gentle sweetness, while salt balances the flavor. Eggs or egg yolks help bind the dough and contribute tenderness; yolks alone create a particularly rich pastry.
A small amount of sour cream or milk brings the dough together and makes it workable without making it wet. Sour cream adds mild tang and tenderness, while milk offers a straightforward alternative. Add the liquid gradually, since the amount needed can vary with the flour, egg size, and room conditions. The finished dough should hold together when pressed but should not feel sticky. If it seems crumbly, add a teaspoon of liquid at a time; if it is soft or tacky, chill it before rolling rather than adding excessive flour. Accurate measurements and gentle mixing help prevent a tough crust.
Walnuts are the traditional choice for the sweet filling, bringing a full, slightly earthy flavor that pairs well with buttery pastry. Pecans can replace them for a milder, sweeter result, or the two can be combined for a mixed-nut filling. Chop the nuts finely so the filling spreads evenly, but do not grind them into a paste; a little texture gives each slice a satisfying bite. Sugar sweetens the mixture, and a small amount of milk, beaten egg, or another suitable binder helps it hold together. Vanilla is a familiar flavoring, while cinnamon adds warmth and finely grated lemon or orange zest gives a brighter note. Measure the filling ingredients carefully so it remains moist enough to spread without becoming runny, which can make shaping and baking difficult.
Begin with the pastry ingredients measured and ready, then combine them gently in a bowl. Add the wet ingredients to the dry ingredients and mix only until the mixture gathers into a soft, cohesive dough. Stop as soon as no loose flour remains; continued mixing can make the pastry tough instead of tender. The dough should feel pliable and hold together when pressed, but it should not be sticky. If it clings heavily to your hands, add a little flour rather than kneading in more. Divide the dough into manageable portions, shape each into a flat disk, wrap securely, and refrigerate until firm enough to roll without sticking.
While the pastry chills, prepare the nut filling. Combine the ground nuts with the other filling ingredients, mixing or heating them just enough to make a cohesive, spreadable mixture. Avoid cooking it for longer than needed, since excess heat can dry it out or make it difficult to spread evenly. Transfer the filling to a shallow dish and let it cool completely before assembling the cookies. A warm filling can soften the chilled dough, causing it to tear or become difficult to handle. If the filling firms as it cools, stir it briefly until it is easy to spread, but keep it cool.
Work with one portion of dough at a time, keeping the remaining portions chilled. On a lightly floured surface, roll the dough into a thin rectangle, turning it occasionally and dusting sparingly to prevent sticking. If small cracks appear at the edges, press them together gently with your fingertips; avoid repeated rolling or kneading, which can toughen the pastry. Spread a thin, even layer of cooled filling over the rectangle, leaving a narrow border uncovered. Starting at one long edge, roll the pastry into a neat log without stretching it. Pinch the seam closed and place the log seam-side down. Repeat with the remaining portions, then prepare the logs for slicing and baking according to the recipe.
Arrange each filled log seam-side down on a baking sheet lined with parchment paper, leaving space between logs so heat can circulate evenly. If a glossy, lightly browned finish is desired, brush the tops with a thin layer of beaten egg. Bake in a preheated oven according to your recipe, watching for pastry that looks set and has turned lightly golden. Oven temperatures and log thickness can vary, so use the visual cues as well as the suggested baking time. Avoid moving the logs while they are hot; the pastry and filling are delicate straight from the oven.
Let the baked logs cool completely on the sheet or transfer them carefully to a wire rack. Cooling allows the pastry to firm and the filling to settle, making neat slices less likely to crumble or squash. Use a sharp serrated knife and gentle, short sawing strokes rather than pressing straight down. Wipe the blade between cuts if sticky filling builds up. For more even cookies, trim the ends first, then slice the logs into pieces of similar thickness.
If filling leaks during baking, the log may have been overfilled or its seam and ends may not have been sealed firmly. Use a moderate layer of filling next time, keep it away from the edges, and pinch the dough closed before placing the seam underneath. Tough pastry is often the result of excessive handling or adding too much flour while rolling. Work the dough only until smooth, and use a light dusting of flour to prevent sticking rather than incorporating extra flour into the dough.
Serve the cookies plain or finish them with a light dusting of confectioners’ sugar once fully cool. Store baked slices in an airtight container at room temperature for several days, separating layers with parchment if needed. For longer storage, freeze baked slices in a sealed, freezer-safe container, or freeze unbaked logs tightly wrapped. Thaw baked cookies at room temperature while still covered to limit drying. Thaw unbaked logs in the refrigerator, then slice and bake as directed; avoid thawing them uncovered, which can dry the pastry and affect its texture.